

Here’s a confession: I didn’t set out to become a toad landlord. It started with one cracked terracotta pot, a rainy afternoon, and a garden that had way too many slugs for its own good. Flip that pot on its side, tuck it under a hosta, and suddenly you’ve got yourself a DIY garden toad house — and a tiny, warty tenant who eats bugs for rent.
If you’ve never built one before, you’re in for a treat. A toad house is one of the easiest, cheapest, and most rewarding projects you can add to your yard. It costs almost nothing, takes less time than watching an episode of your favorite show, and it turns your garden into a genuine garden wildlife habitat — not just a patch of dirt with tomatoes in it.
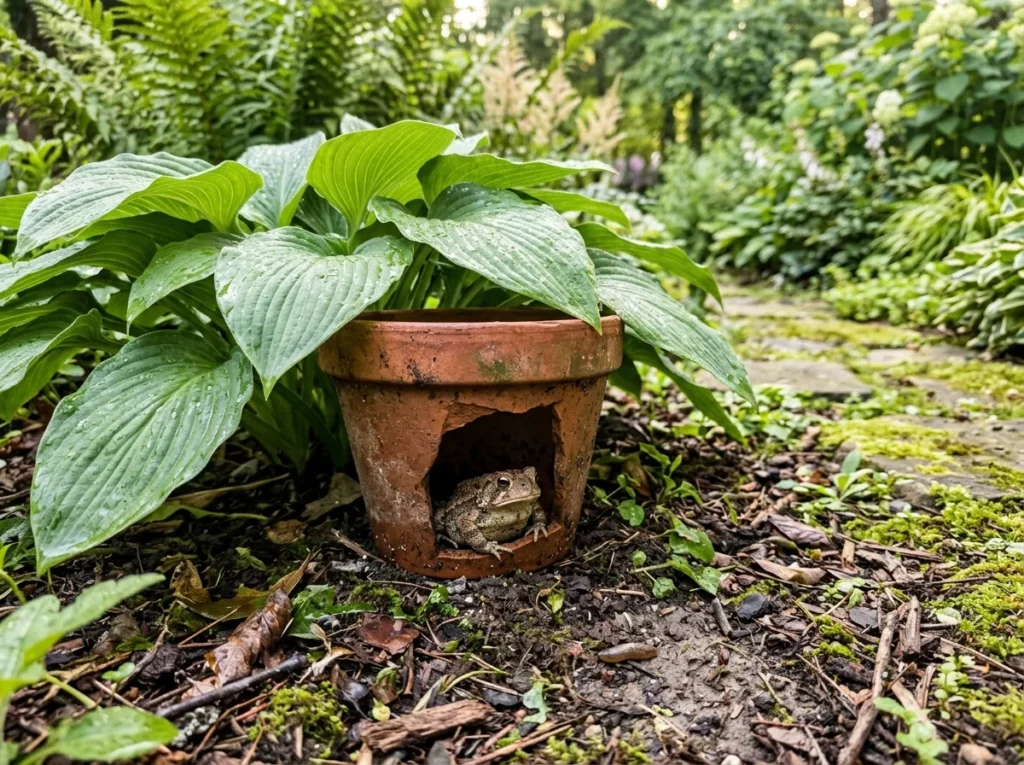
So grab a pot, a paintbrush, and maybe a kid or two, because we’re building a backyard toad house that’ll have every toad in the neighborhood asking for a lease.
Table of Contents
What Is a DIY Garden Toad House, Exactly?
A toad house — sometimes called a toad shelter, toad abode, or toad habitat — is just a small, dark, moist hideaway that gives toads a place to cool off during the day. Toads are nocturnal hunters. During daylight hours, they need somewhere shaded and damp to hide from predators and avoid drying out. Give them that spot, and they’ll happily patrol your garden at night, snacking on slugs, beetles, and mosquitoes.
Think of it as a tiny, rent-free Airbnb — minus the awkward host reviews.
Why You Should Build a Toad House (It’s Not Just Cute)
Sure, a toad house looks charming tucked into a flower bed. But the real magic is what it does for your garden:
- Natural pest control. A single toad can eat thousands of insects in a season.
- No chemicals needed. Toads do the dirty work so you don’t have to reach for pesticides.
- A boost for biodiversity. Every eco friendly garden habitat benefits from more amphibians, birds, and pollinators sharing the space.
- A genuinely fun project. It’s low-cost, low-skill, and satisfying in a way that few garden tasks are.
If you already love projects like our DIY Butterfly Puddler: How to Build a Butterfly Mud Station Your Garden Deserves, a toad house is the next natural step toward a garden that works with nature instead of against it.
15 DIY Garden Toad House Ideas
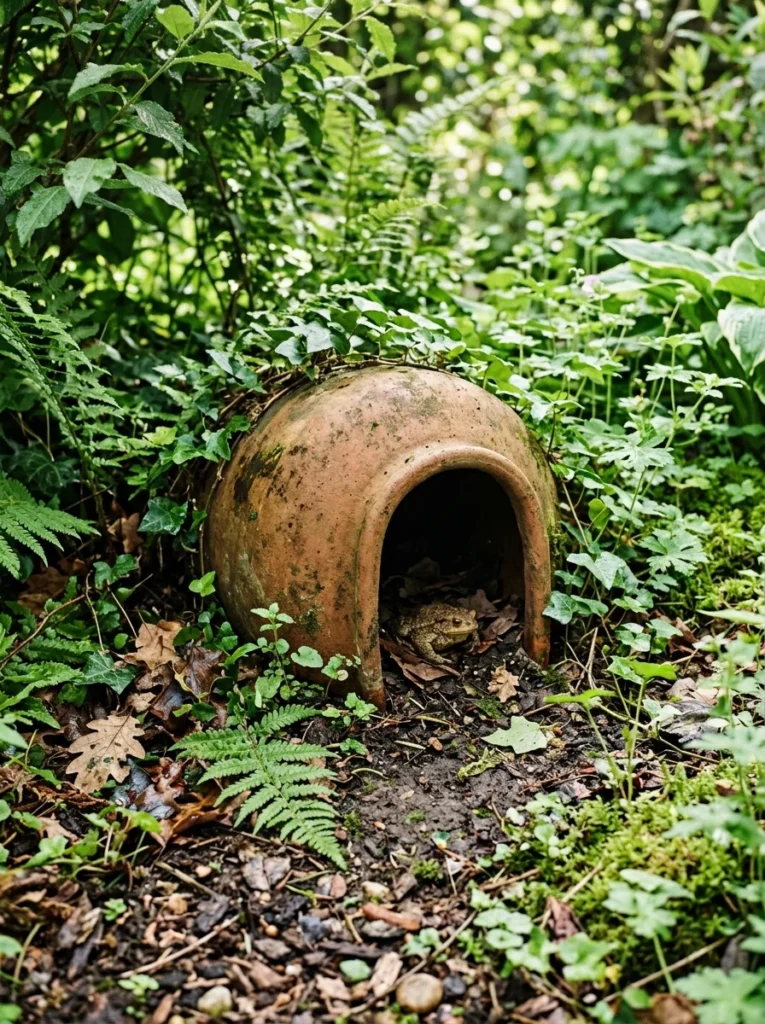
1. The Classic Clay Pot Toad House
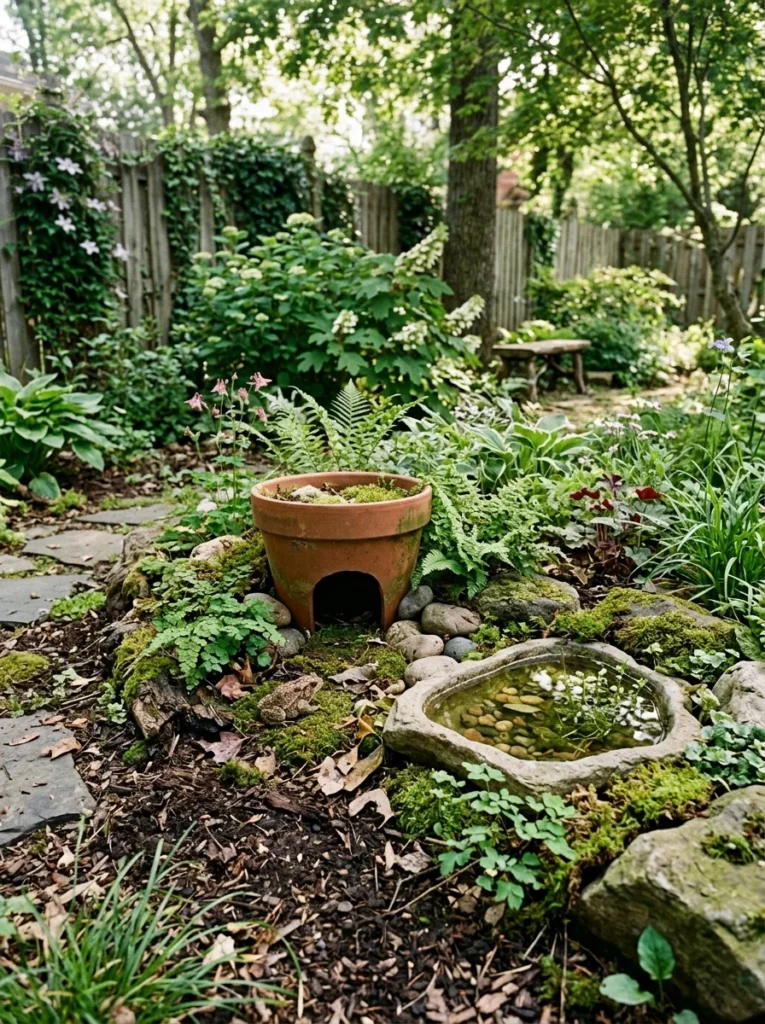
The original, the icon, the one that started it all. A simple clay pot toad house made from an upended terracotta pot with a chipped entryway is still the gold standard. It’s breathable, holds moisture well, and looks right at home in any garden bed.
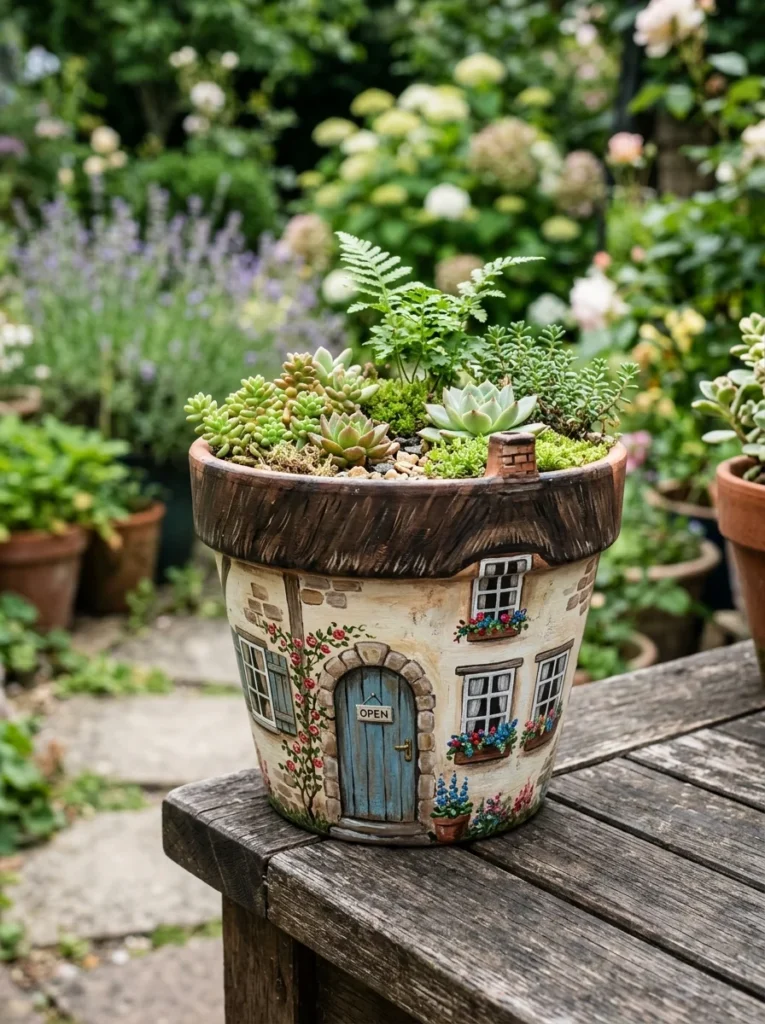
2. The Whimsical Painted Cottage
Turn a plain pot into a fairytale cottage with outdoor acrylic paint and a little imagination. Add a painted door, tiny windows, even a chimney. This decorative toad house style is a favorite for gardeners who want function and flair.
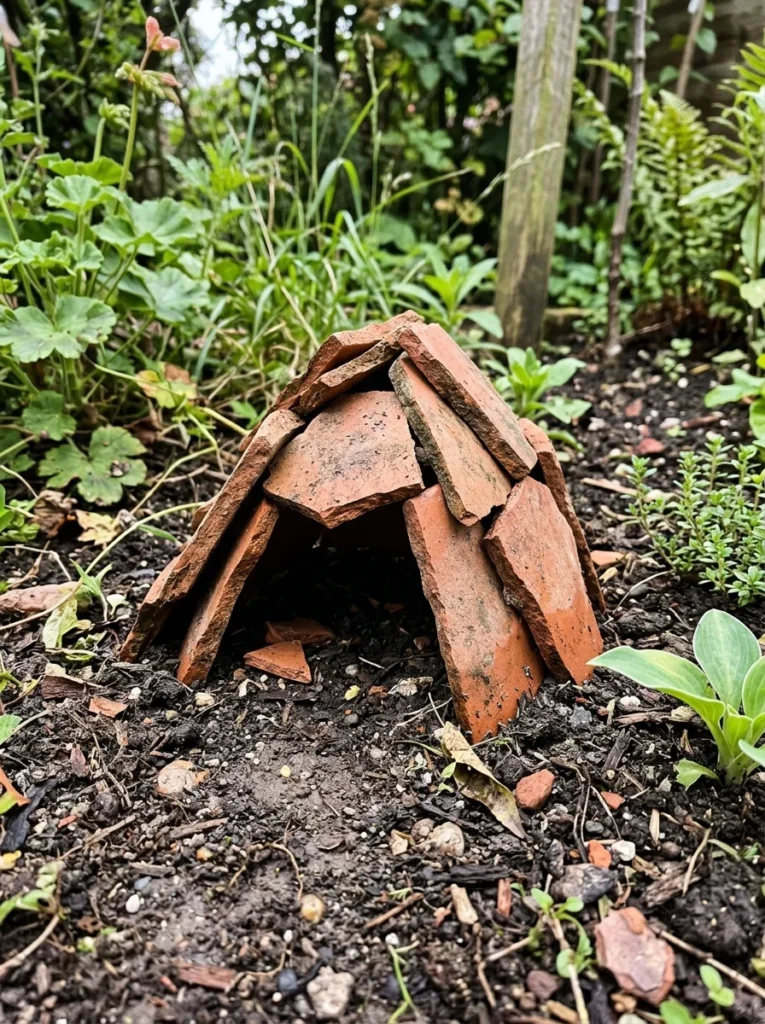
3. The Upcycled Terracotta Shard House
Got a broken pot? Don’t toss it. Lean the shards together like a tiny lean-to. This upcycled toad house is the ultimate “waste not, want not” project.
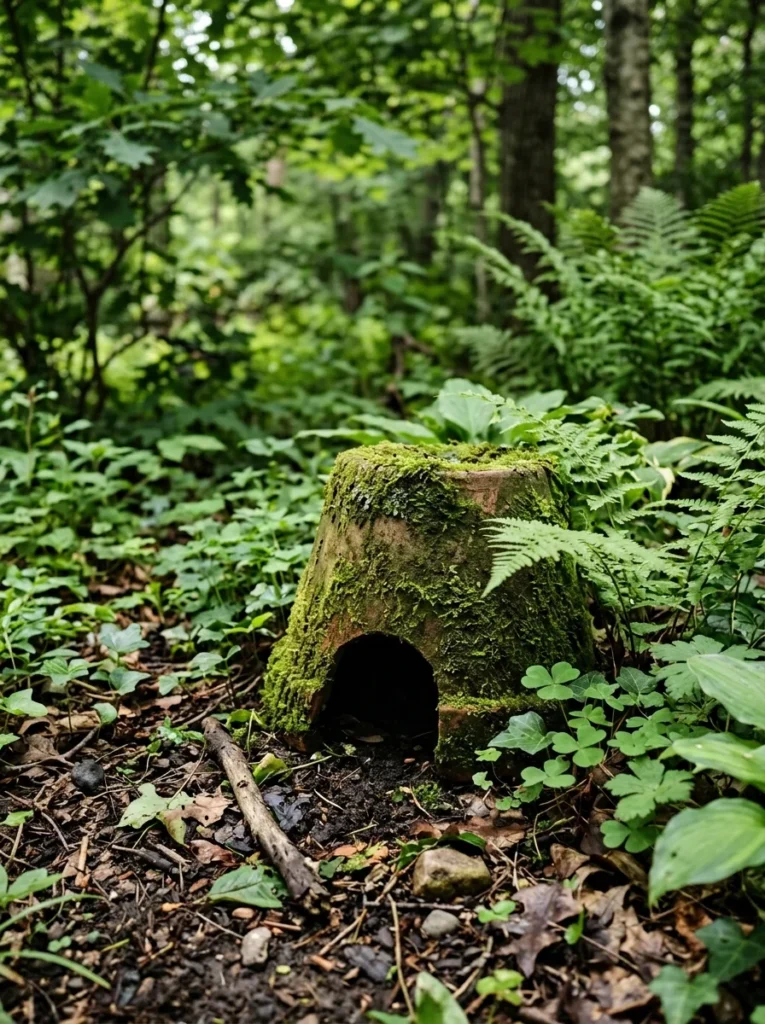
4. The Mossy Woodland Hideaway
Cover your pot in a moss sheet for a naturalistic, forest-floor look. It blends beautifully into shady corners and gives your toad extra camouflage from predators.
5. The Terracotta Saucer Cave
Instead of a pot, use a broad terracotta saucer propped up on stones. It creates a low, wide toad abode that’s easy for toads to squeeze into from multiple angles.
6. The Log-and-Bark Shelter
No clay pot on hand? A hollowed log or a few pieces of stacked bark work just as well for a rustic, woodland-style homemade toad house.
7. The Stone Grotto
Stack flat stones into a tiny cave. It’s sturdy, weatherproof, and doubles as a stylish garden accent — no glue required.
8. The Fairy Garden Crossover
Combine your toad house with mini garden figurines for a whimsical fairy-garden theme. Kids especially love this one.
9. The Hanging Basket Base House
Repurpose an old hanging basket liner as a soft, moisture-retentive base for your toad shelter.
10. The Buried Flowerpot Den
Bury a pot on its side, entrance facing out, so it sits flush with the soil. This creates a cooler, more insulated toad habitat than a house sitting fully above ground.
11. The Bark-and-Moss Combo Cottage
Layer bark shingles over a simple frame and finish with moss for texture. It’s a slightly more advanced build, but the payoff is a genuinely gorgeous garden feature.
12. The Recycled Coconut Shell House
Halve a coconut shell, carve out an entrance, and you’ve got a lightweight, tropical-leaning toad house craft that’s perfect for smaller gardens or container setups.
13. The Concrete Stepping-Stone Shelter
Prop a decorative stepping stone at an angle against a low mound of soil. Simple, sturdy, and it doubles as garden décor.
14. The Painted Terracotta “Address Plaque” House
Add a wooden plant label out front with a cheeky name like “Toad Manor” for a fun, personalized touch — great for an easy toad house project with kids.
15. The Layered Habitat Zone
Go all-in: combine a clay pot house, a nearby water dish for garden use, some leaf litter mulch, and a patch of native plant seed mix for a full wildlife friendly garden zone, not just a single house.
Materials You’ll Actually Need
| Material | What It’s For |
|---|---|
| Terracotta or clay pot | The base structure of most toad houses |
| Outdoor acrylic paint + sealant | Safe, weatherproof decoration |
| Pebbles or river stones | Stabilizing the house, framing the entrance |
| Moss sheet | Natural camouflage and moisture retention |
| Leaf litter mulch or compost | Moist bedding inside and around the house |
| Small hand trowel | Digging the placement spot |
| Waterproof craft glue or hot glue | Attaching lightweight décor |
(See the full product roundup below for specific recommendations.)
Is a Clay Pot Toad House Really the Best Option?
Honestly? For most backyards, yes. Terracotta is porous, so it breathes and holds humidity better than plastic or metal. It’s also cheap, widely available, and easy to decorate. That said, wood, stone, and even coconut shells all work fine if you want to switch things up — the material matters less than the moisture, shade, and shelter it provides.
Where Should You Place a Toad House?
Location makes or breaks your toad house’s success. Aim for:
- Shade over sun. A shade toad house stays cooler and retains moisture longer. Full sun will dry it out fast.
- Near water. Toads don’t need a pond, but a shallow water dish for garden areas nearby helps a lot.
- Tucked into greenery. Placing it under hostas, ferns, or dense shrubs mimics their natural habitat and offers extra predator protection.
- Low-traffic zones. Somewhere you won’t be tripping over it (or over the toad) is ideal.
If you’re already planning out shaded, pollinator-friendly corners of your yard, this pairs nicely with ideas from our 15 Butterfly Bush Landscaping Ideas That’ll Make Your Yard the Talk of the Neighborhood — shade-loving, wildlife-friendly landscaping tends to work well together.
Do Toads Need Water Near Their House?
They don’t need to live in water like frogs do, but toads absorb moisture through their skin and will dehydrate without access to it. A shallow dish, refreshed regularly, is usually enough. If you love the idea of water features for wildlife, you might also enjoy our 15 DIY Bird Bath Ideas That’ll Turn Your Yard Into a Bird Sanctuary — many of the same principles apply.
How Big Should the Entrance Be?
Aim for an opening roughly 2 to 3 inches wide — big enough for a toad to squeeze in, small enough to discourage larger predators from moving in uninvited.
Can You Build a Toad House With Kids?
Absolutely, and honestly, it might be the best part of this whole project. Painting pots, gluing on pebbles, naming your toad tenant — this is a genuinely great weekend activity that sneaks a little ecology lesson in alongside the glitter glue.
How Do You Decorate a Toad House Safely?
Stick to outdoor acrylic paint and let it fully cure before placing the house outside. Seal painted surfaces with an outdoor sealant so nothing chips or leaches into the soil. Avoid anything with sharp edges or small detachable pieces a toad (or a curious pet) could swallow.
What Should You Put Inside a Toad House?
A shallow layer of leaf litter mulch, damp soil, or compost gives toads a soft, moisture-rich floor. Avoid anything treated with chemicals or fertilizer.
How Do You Keep It Moist?
A quick misting with a garden hose nozzle every few days during dry spells keeps things comfortable, especially in summer heat.
How Do You Stop It From Tipping Over?
Nestle the base into the soil slightly, or ring the bottom with pebbles or river stones for stability. A little digging goes a long way.
Will a Toad House Attract Bugs or Pests?
A few insects, sure — but that’s actually the point. Toads are drawn to areas with insect activity because that’s their food source. You’re not creating a pest problem; you’re creating a pest solution.
How Do You Maintain a Toad House Over Time?
Check moisture levels weekly, refresh bedding seasonally, and repaint or reseal decorative pots as needed. Otherwise, it’s refreshingly low-maintenance — toads aren’t picky tenants.
Final Thoughts
A DIY garden toad house is proof that small projects can make a real difference. It costs next to nothing, takes an afternoon at most, and rewards you with a quieter pest problem and a genuinely charming garden feature. Whether you go classic terracotta or full whimsical fairy cottage, your future toad tenant won’t be picky — just give it shade, moisture, and a little peace and quiet.
Ready to build yours? Grab a pot, pick a shady corner, and let your garden do the rest. And if you’ve already built one, I’d love to hear what your toad house looks like — drop a comment and show it off.









2 thoughts on “15 DIY Garden Toad House Ideas That’ll Turn Your Backyard Into a Five-Star Amphibian Resort”